mrblueskye

Category: Food

UASHMAMA PAPER BAG

I am kind of dying over this gold and paper bag. Its actually not really paper, but a cellulose fibre that can be washed and laid flat for storage. The bags were originally meant to be used for bread, but can used for other storage as well. I think a few of these would look great on the counter for linen storage or set at the Christmas dinner table with fruit and bread.

gold_bagAvailable at Safari Living prices range from $27-$79

A Black, White & Grey Holiday Gift Guide

I thought that I would put together a few holiday gift lists over the next few weeks and I figured what better place to start than a black & white gift list! OB-Black & White Christmas Gift List

1/2/3/4/5/6/7/8/9/10

10 Stylish Table Linens Under $50

Here is the latest piece that I just wrote for mom.me

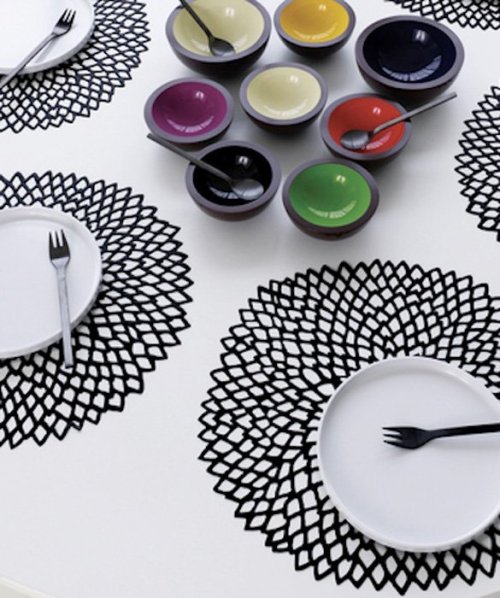
10 Stylish Table Linens Under $50 – Dahlia Placemats – mom.me.

Mushroom Foraging

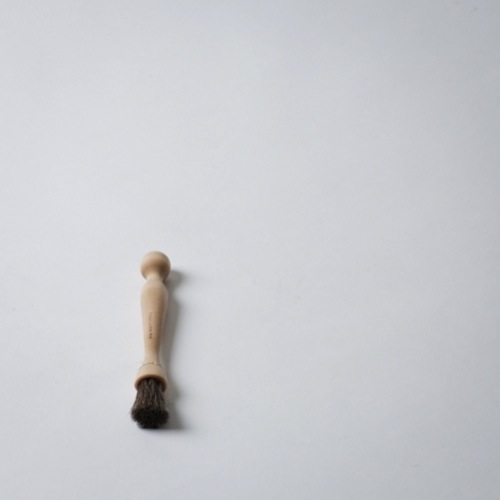
One of the things that my mom, sister and I would love to do is to go mushroom foraging. I just came across this mushroom knife and brush from a beautifully curated  store in Toronto called Mjolk. Looks like we might have a mushroom foraging adventure in the near future. 

Apricot-Mango Jam

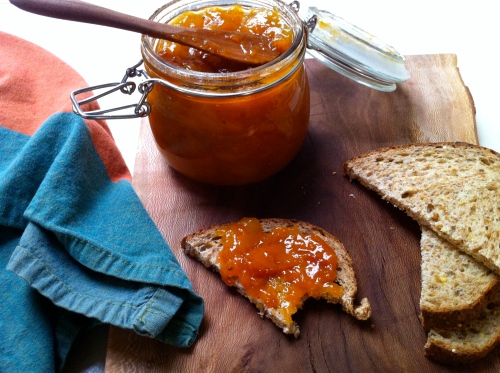
Apricot-Mango Jam

Ingredients

  • 1 pound apricots
  • 1 pound frozen mango (I buy mine at Trader Joe’s)
  • 1 vanilla bean
  • 1 cup granulated sugar
  • juice from 1/2 lemon
  1. wash/dry and cut apricots in half removing the pit
  2. with the fine tip of your knife slice down the center of the vanilla bean and scrape out the seeds
  3. add everything to your pot and bring to a simmer so the sugar dissolves (this just takes a few minutes)
  4. put a lid on the pot and let the mixture sit overnight so that the fruit becomes macerated
  5. remove the lid and bring back to a simmer over a medium heat for 20-30 minutes, stirring occasionally so that it doesn’t stick to the bottom of the pot
  6. when you can run your finger down the back of a wooden spoon and the jam doesn’t ooze back together its done.
  7. remove the vanilla bean and pour into a sterilized jar ( I used a 17oz jar from Ikea)

Enjoy !

Walnut-Miso Butter and Quick Strawberry Jam

Our first book club meeting was this weekend at my house and I wanted to make up some quick appetizers for everyone so I went to the Farmers Market on Saturday to see what was looking good. I recently saw a recipe on tastespotting (food porn at its finest) for Walnut-Miso Butter with Radishes on Baguette and decided to try it out. The recipe that I saw really wasn’t a recipe it was a few beautiful pictures and then the writer said that she didn’t have a recipe and the rest of the article was finished in Japanese?!?! So I just had to wing it.

I really enjoyed the Walnut-Miso Butter especially when paired with the radishes. I decided to add a couple tablespoons of Champagne Vinegar to the butter to help cut the saltiness of the Miso. The radishes that I got at the farmers market were pretty mellow in taste, but the radish greens really packed a punch and just tasted so delicious with the Miso Butter.

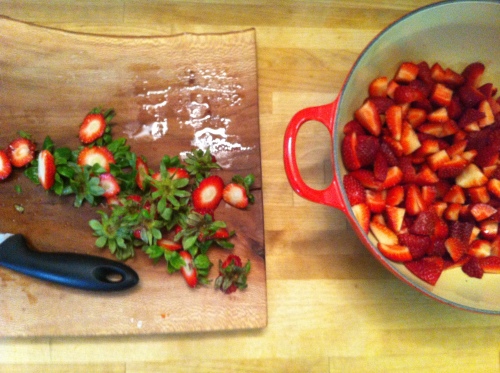
I  I also picked up a container of really cute strawberries while I was at the market and whipped up a super simple jam while Skye was napping.

Walnut Miso Butter with Sliced Radish and Radish Greens

  • 3 T White Miso (room temp)
  • 6 T Unsalted Butter (room temp)
  • Handful of Toasted Walnuts
  • 2 T Champagne Vinegar 
  • 4-6 Thinly Sliced Radishes 
  • Handful of Radish Greens
  • Baguette
  1. In a food processor mix up the butter, miso and walnuts
  2. Gently heat the Champagne Vinegar in a small sauce pan and slowly pour it in the butter mixture until desired consistency
  3. Thinly slice radishes
  4. Slice Baguette

Assemble the baguette by spreading about a teaspoon of the miso mixture, top with sliced radishes and radish greens. 

Quick Strawberry Jam

  • 1 pint of strawberries
  • 1/2 cup of sugar
  • 1 vanilla bean
  • a little lemon zest
  1. wash and cut up strawberries
  2. run a sharp knife down the middle of the vanilla bean
  3. put sliced strawberries, vanilla bean and 1/2 cup of sugar and zest in a medium pot and turn heat on to medium
  4. let simmer 30-60 minutes until you can run your finger down the middle of the spoon and the jam doesn’t ooze back together.
  5. I like to take the vanilla bean out before I add the jam to the jar, but you can leave it in
  6. This makes enough jam for a small 5 oz jar that you would eat right away. I didn’t sterilize the jar, but I did wash it in extremely hot water before adding the jam.

Harissa

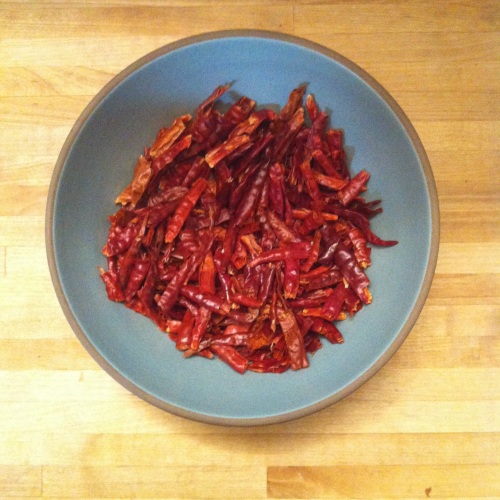
If you want to have a serous life changing experience then you need to try Harissa. Harissa is a North African condiment made with chilies and garlic and most importantly Cumin. I think Cumin has to be hands down my number one favorite spice Ever! I don’t even know where to being to describe the taste. Its earthy and nutty and spicy and smoky all at the same time. Its amazing.

This is my recipe for Harissa. I play it by ear sometimes and adjust the seasonings as I go along so feel free to do that as well.

Harissa

  • 1 bag of small chili peppers (4oz bag)
  • 1 head of garlic
  • 2 T cumin
  • 2 tsp corriander
  • 1 tsp salt
  • 2 1/2 cups of olive oil
  1. Remove the seeds from the chili peppers (this can be very tedious and make you sneeze)
  2. Put the chili peppers in a bowl and cover with hot water and let steep for 1 hour
  3. Strain the chili peppers pressing out any extra liquid and put in a food processor
  4. Peel an entire head of garlic and put in the food processor
  5. Add the spices, salt and olive oil
  6. Blend until you get a smooth consistency and adjust spices to your liking

This makes three cups of Harissa. I put mine in two 12 oz Ball Jars and gave one away as a gift. After each use of Harissa you can drizzle a tiny bit of olive oil on the top to keep it from drying out.

I put Harissa on everything. Its great with eggs, potatoes or even mixed into tomato soup. Pretty much anything that you would put hot sauce on or want to add a kick to Harissa will be your go to spicy condiment. Trust me you’ll be addicted soon!

Homemade Soda

A few years ago Zach’s mom bought him a Soda Stream for his birthday. I thought it was the dumbest thing ever. I was even more annoyed by it because where was I going to put it. Its huge and its ugly.  Fast forward two years ( I do a lot of fast forwarding on this blog) We have cabinets now! Woo Hoo we have storage for large ugly things like Soda Streams. So now I’m into the Soda Stream because I can make carbonated water and with sparkly fizzy water comes homemade soda mixtures. The first mixture I made last week was homemade Ginger Ale. Super super easy to make. Peel and cut into chunks a cups worth of ginger and pulse it in the food processor. Put the minced ginger in a pot and cover with two cups of water and bring to a simmer. Turn off the heat and let the ginger steep for at least an hour. I think I might go a little longer next time to let it get a bit more strong. Strain out the minced ginger and return the liquid to the pot I added a half cup of sugar, but the next time I’m only going to add a quarter cup. Bring back to a simmer and then turn off the heat and cool down. Now if you want to get all fancy you can add some chili peppers to the ginger during the first steeping or black peppercorns. Anything to give it a bite. So when the mixture cools make some fizzy water in the Soda Stream (or you can just buy fizzy water) mix in the amount of ginger syrup to your liking and Voila! Homemade Ginger Ale!!!

So now that I think I’m all amazing making homemade Ginger Ale I decided to make Blood Orange and Lemongrass soda. This is a really beautiful drink. It tastes and looks like summer

Cut up three stalks of lemongrass and pulse in the food processor. I didn’t get to pulse mine as much as I wanted because Skye was napping so you might want to pulse yours a bit smaller than mine. Then slice up two medium sized blood oranges. Put in a pot and cover with two and a half cups of water. Bring to a boil and then turn off the heat and put a lid on it. I covered mine for a little over two hours. Strain out the lemongrass/orange mixture into a bowl and then press on the fruit to get any remaining juice out. Put back on the stove top and add one quarter cup of sugar and bring back to a boil. Turn off the heat and let it cool off. I was thinking that the next time I make this mixture that I might add a vanilla bean to it and kind of make a fancy creamsicle type of soda.

I was pleasantly surprised by the taste of this mixture. Its almost flowery or perfumey. Probably because of the oils in the orange peel. If you have ever baked with orange blossum essence (I’ve found it at the Italian market in my neighborhood) it kind of tastes like that.

I’m going to try to come up with a few more ideas this weekend. Maybe something with pears…

I think that this Weck Juice Jar Set would be perfectly beautiful for holding soda mixtures too!

Grilled Peach and Fontina Pizza

I am so lucky to live in such a fantastic neighborhood. We live in Little Italy in San Diego, CA. Right down the street from our loft is an Italian market called Mona Lisa. The name is cliche I know, but they’ve been around forever and offer up everything Italian and amazing.

I use to make my own pizza dough pre kid, but then I discovered that Mona Lisa carries already made dough from their restaurant for about two dollars. If you don’t have an Italian market by you or a pizza place I know that Trader Joe’s carries pizza dough.

I like to grill my dough. A few years ago I bought a cast iron smoker box and a few different kinds of wood chips. I get the grill super super hot and let the wood chips smolder and start to smell wonderful. I par grill the dough for about 2-3 minutes on each side before I put any toppings on. It makes it easier when transferring to the grill. I also make sure to rotate the dough to make sure it doesn’t get too charred underneath.

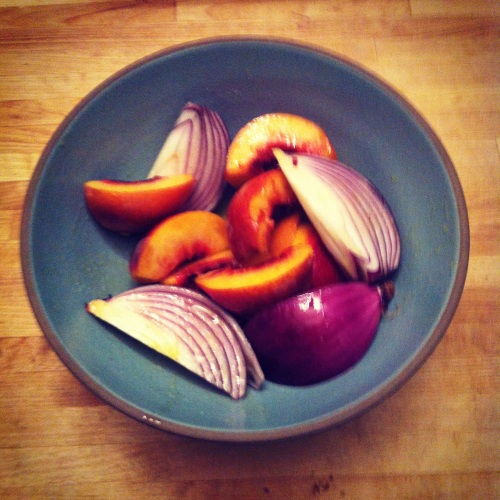
Last night I grilled up some peaches and red onion. Grilling fruit brings out the natural sugars and makes it taste so much more amazing. I topped the pizza with freshly grated fontina cheese the grilled peaches and red onion and thinly sliced prosciutto. After grilling it for a few minutes I topped it off with some arugula a drizzle of olive oil and balsamic vinegar.
Grilled Peach and Fontina Pizza

Serves 2

1 Pizza Dough

Olive Oil for brushing the pizza crust and the grill

2 Peaches or Nectarines cut into quarters

1/2 Red Onion cut into quarters with the root still attached

1 1/2 cups of freshly shredded Fontina cheese

A few slices of thinly sliced Prosciutto torn into pieces

A handful or two of Arugula

Drizzle of Olive Oil and Balsamic Vinegar

Freshly cracked pepper

Pre heat the grilled to around 400-500 degrees

Set the pizza dough out on counter top or large cutting board. Sprinkle with flour and let sit for half an hour before rolling out. This lets the sugars break down in the dough and make it easier to roll out.

Roll out the pizza dough and then work it around in a circle to stretch the dough.

Brush the dough with olive oil and sprinkle a little salt on the crust

Carefully transfer to a well oiled hot grill

Cook for 2-3 minutes on one side and then flip over and cook for 2-3 more minutes

Transfer the par cooked dough back to work surface

Cut the nectarines and onion into quarters and drizzle with olive oil and salt and pepper and then mix thoroughly to cover the fruit.

Transfer to the grill and cook until there are grill marks on all sides and the fruit and onion start to soften.

I like to cool the fruit for a few minutes and then cut the quarters in half

Top the par cooked dough with fontina cheese, peaches, red onion and prosciutto

Place back in grill and cook until the cheese is melted and the prosciutto starts to crisp up making sure to rotate the pizza a few times so it doesn’t get burned underneath

Remove the pizza and let it sit for a few minutes before cutting it. Throw a handful or two of arugula on top and drizzle olive oil and balsamic vinegar and a few cracks of pepper


The Daily Dish

Putting the FUN in funicular.

Butter Baking

A blog of baked goods, custom cakes and desserts

<<< pinback >>>

Just another WordPress.com weblog

A blessing and a curse

Keep feeling fascination ... and you end up with a blog.

happy babywearing 365

Just another WordPress.com site

My Blog

Just another WordPress.com site

Miss Bell's Art Class Blog

Just another WordPress.com weblog

Food For Thought

Culinary Exploration For The Everyday Cook To The Greatest of Chef's

Kiln Design Studio

enamel-family-love-studio

eatwithana

Passionate about everyone eating better!

Elaine's blog

Professing, Mommying, and Living

localkitchen.wordpress.com/

Local cooking and eating in New York's Hudson Valley.